At first, the art of creating bead jewellery may seem daunting. The object of this guide is to clearly explain the basic tips and techniques. Once you have mastered a few simple concepts you will find bead jewellery making an inexpensive, rewarding and even profitable hobby.
Tools
It is advisable to invest in a set of pliers as these will prove invaluable.
- · Round-nosed pliers are for bending the wire into loops and opening and closing loops and rings.
- · Half-round or flat-nosed pliers are for cutting wire and for gripping.
- · Side cutters are for cutting wire.

Here are some other tools you may find useful:
- · Multipliers combine all of the above in one handy tool.
- · Crimping pliers give a neat, professional finish to crimps.
- · Memory wire cutters make it easy to cut through tough wire.
- · Snippers are extremely sharp and give a clean cut through the thread.

Necklaces
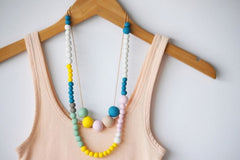
 First,choose the beads and/or pendants that take your fancy.You may want to colour coordinate with an outfit, or go for a particular style to suit your personality. Almost anything goes. Experiment and have fun
 Necklaces Featuring Pendants
Pendants can be attached to threads in a variety of ways, depending on their form.

Some pendants have a loop at the top (1). Others have a hole running through them, either front to back (2) side to side (3) or top to bottom (4).
There are a number of ways of attaching the pendant to the thread of any thickness.
On pendants with small holes or loops running from front to back, use either a jump ring or a bail and loop. The thread can pass through this, leaving the pendant hanging correctly so that it sits flat on your neck.
- One jump ring - Open the jump ring with a pair of round nosed pliers. It is important not to leave any gap at the join on the jump ring. Opening the jump ring sideways will help. Close the jump ring with the pendant attached.
- Two jump rings or bail and loop - If the hole runs from side to side,bail and loop could also be used, but check that the size of the loop is big enough for the thread. Open one jump ring, using round-nosed pliers, and join it to both the pendant and the other jump ring. Close it up again with the same pliers. Squeeze the looped bail tightly shut, with the prongs through each side of the hole on the pendant.

- Large holed pendants - With large holed pendants the thread itself can be looped in such a way that the pendant hangs correctly. Fold the cord in two. Pass the folded end through the hole in the pendant and pass the loose ends through the loop just created. Pull until the pendant hangs straight. It is a good idea to add one or more merge holed beads to the top of the pendant.
- Hanging drops - To hang drops you need to create a loop for the thread to run through. To do this, use a headpin. If the hole through the drop is too large for the headpin to hold it, you will need a cup or small bead at the bottom. Position the cup at the bottom of the headpin and add the drop. With the cutters, cut a generous centimetre above the top of the drop. Bend the pin directly above the bead at a right angle and then curl the top of the pin into a loop with the round-nosed pliers.

Necklaces Featuring Beads

First, think about the length you want your necklace and whether or not you want the thread to be covered completely. A shorter necklace or choker usually has a largish bead or pendant as its centrepiece. A popular design feature of this style is to leave a portion of the cord or leather thong on view. If you are filling the thread and using beads of the same size, you can work out how many you will need once you have decided on the length. Use a tape measure around your neck to get an idea. Then divide that measurement by the length of a bead. So, for a filled choker of 40cm, you will need 50 8mm round beads.
Experiment with different sized beads. The most usual way is to use smaller beads at the back where the necklace needs to be comfortable to wear, and larger beads at the front, on prominent display. Consider using spacer beads between larger beads. Choose a colour to tone or contrast, or simply neutral like silver or gold. You could knot the thread in between each bead. It can be very effective to knot groups of beads along the thread, as illustrated.
--------

***


